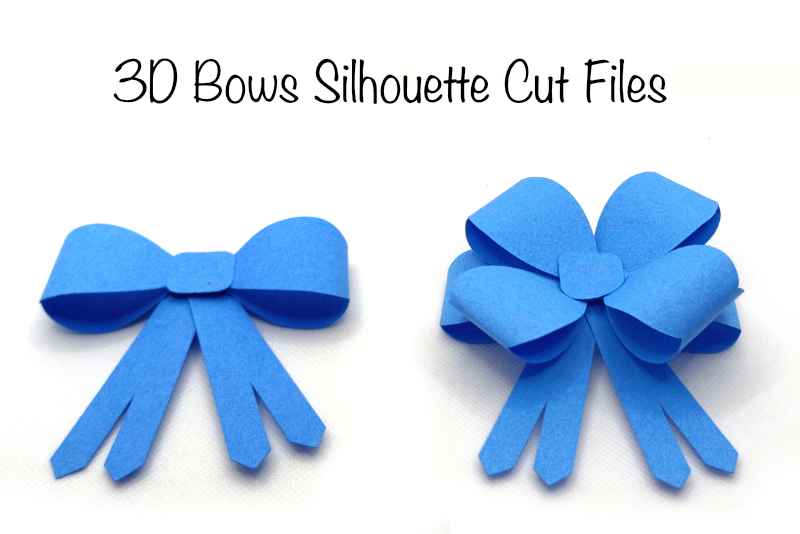
3D Bows Silhouette Cut File

In this Silhouette Studio® tutorial, we will create a 3D bow, using the software's Flexishape feature. This bow is very flexible and can be used for any project from holiday decor to personal gifts.
Silhouette, Silhouette Studio, Silhouette Connect, PixScan, Silhouette CAMEO and Silhouette Portrait are either registered trademarks or trademarks of Silhouette America, Inc. Product screen shot(s) reprinted with permission from Silhouette America®, Inc.
- In the Page Setup panel, set the Machine to Cameo 5, Feed Type to Auto/Manual, Cutting mat to Cameo and Media Size to the size of your paper for the bow (see screenshot).
- In the Flexishape panel, select the tear drop shape (fifth row and sixth from the left). Draw a horizontal tear drop, about 2 inches long and with the point facing to the left (see screenshot).
- Right-click the oval and choose Convert to Path. Click the oval with the Edit Points tool (see screenshot).
- Remove the anchor point that is farthest to the right (see screenshot).
- Select the anchor point at the tip of the oval. Using the anchor handles, reshape the point in to a curve.
- With the Rounded Rectangle tool, draw a small .5 x .5 inch rectangle over the left edge of the bow shape (see screenshot).
- Select both shapes and click the Weld icon in the Quick Assess Toolbar, to make them in to one shape.
- With the shape still selected, click the Duplicate icon in the Quick Assess Toolbar.
- With the duplicate shape selected, right-click and choose Flip Horizontally.
- Drag the duplicate shape to the right of the original shape. The widest part of the shapes should be overlapping just slightly (see screenshot).
- Select both shapes and click the Weld icon (see screenshot).
- Choose the Flexishape that is the eight shape in the first row.
- Draw one shape about 3 inches long (see screenshot).
- Duplicate the shape.
- Use the shape's rotation handle to rotate the top of one tail just a little closer to the duplicate shape.
- Use the arrows on your keyboard to move the top of one tail to overlap the other tail's top (see screenshot).
- Weld these two shapes together to make one tail (see screenshot).
- With the Rounded Rectangle tool, draw a .75 x .75 inch rectangle (see screenshot).
Now we will reshape the oval to look like one side of the bow. But first, we need to convert the Flexishape to a path.
Now let's add the center of the bow.
Next we will duplicate this part of the bow.
Now that we have one side of the bow (when folded), you will cut out two of this shape to make the bow. Or if you wish to have a fancier bow, cut out more pieces and add more loops to your bow.
Let's create the tails of the bow.
Now we want to overlap the tops of these two shapes (see screenshot).
Finally, we need a knot for our bow.
- You will need to cut at least two bow shapes and two tail shapes (see screenshot).
- Fold each bow shape in half and glue the rectangular shaped ends together for each bow shape (see screenshot).
- Overlap the rectangular shaped ends of two bow shapes and glue the ends together (see screenshot).
- Place the tops of the tails next to each other.
- Place the tails behind the bows and glue in place.
- Glue the knot on top of the center of the bow (see screenshot).
Silhouette, Silhouette Studio, Silhouette Connect, PixScan, Silhouette CAMEO and Silhouette Portrait are either registered trademarks or trademarks of Silhouette America, Inc. Product screen shot(s) reprinted with permission from Silhouette America®, Inc.

Related Articles
Editor's Picks Articles
Top Ten Articles
Previous Features
Site Map
Content copyright © 2023 by Diane Cipollo. All rights reserved.
This content was written by Diane Cipollo. If you wish to use this content in any manner, you need written permission. Contact Diane Cipollo for details.


